This recipe for homemade sauerkraut is so easy. Making your own sauerkraut is a great way to add gut healthy probiotics to your diet. It costs just a fraction of store-bought options.

Sauerkraut can seem very intimidating at first. But, in reality, it only requires two ingredients and a week of time to ferment it. In this post, I will show you a step-by-step method to make sauerkraut. I don’t want you to be scared of making fermented foods. So, I tailored this recipe to be as easy and simple as possible. Even a beginner homemaker can make this sauerkraut for their family each week.
Why Make Sauerkraut?
- Healthy gut! Sauerkraut contains healthy probiotics for your digestive system.
- It is affordable! You can save tons of money by switching from store bough probiotics to making sauerkraut from scratch. I calculated it, and for my family it saves us upwards of $60 a month!
- The taste is amazing! Because of the long fermentation time, this sauerkraut has the perfect tangy taste. The salt in this recipe keeps the bad bacteria away but also gives a satisfying salty taste.
Understanding the Basics of Fermentation
Sauerkraut is a naturally fermented cabbage product made with cabbage and salt. Salt causes the cabbage cells to release the sugars that will ferment. The fermenting bacteria convert carbohydrates (sugars) in the cabbage to lactic acid, which creates the sour taste, and carbon dioxide, which produces the bubbles seen in the first few days of fermentation. This bacteria is the “good stuff” for your gut!

Equipment
You can buy a full fermentation kit off amazon for fermenting foods which is a good thing to get if you are just starting out.
In full transparency, I don’t use many of the gadgets that are out there for fermenting so I will be showing you how I do it with stuff I already have in my house. The kits are very handy to have though!
Ingredients
Cabbage, red and/or green
Start with fresh, whole cabbage to limit contamination. I wash mine and let it fully dry off before starting.
Salt
Use non—iodized salt. Salt helps form the brine and acts as a preservative. The bacteria needed for safe fermentation are able to handle higher concentrations of salt. The best way to determine the amount of salt to use is to weigh the cabbage. Do approximately 3 Tbsp. of salt per 5 pounds of shredded cabbage. When in doubt, add a little more salt rather than less.

Detailed Instructions
Cut up 1-3 heads of clean cabbage. Keep 1-2 outer layers of cabbage on the side (not chopped up) to cover your sauerkraut in the jar.

Add Salt (3 TBSP per 5 lbs of cabbage). I had 1000g of cabbage so I used 1.5 TBSP of salt here.

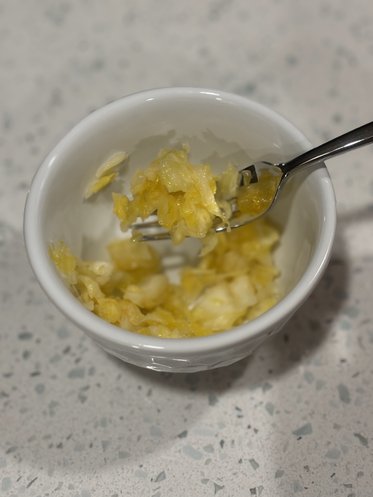
Next you need to mix and crush the cabbage and salt for about 10 minutes with your hands. The goal is for the cabbage to become less firm and for the brine to be created.

Look for liquid to form at the bottom of the bowl. This is when your sauerkraut is ready to be put into a jar.

Add the mixture to as many glass jars as you need. Make sure you push it down tight with your hand or a fermentation tamper and add as much as possible to the jar. There should be brine covering all the cabbage when pressure is placed on it.

Cut a circle into one of the large cabbage leaves you set aside. Use this to cover the rest of the sauerkraut.


Add your weights to this and then loosely fit a lid. You will want to “burp” the lid each day by opening it up and then loosely closing it again to release the CO2 that builds up during the fermentation process. I use drink stones in a plastic bag as my weights. You can also use a clean stone in a plastic nag if you don’t have the glass weights.


Place this in a warm area, away from light, for 7-21 days. The longer it ferments, the more “sour” the taste will be. Taste test it after a week and then place it in the fridge when it reaches your desired taste.
Final Thoughts and Tips
- Add juniper berries, dill, or garlic to give your sauerkraut different tastes.
- You can eat it cold or warmed up. For probiotic purposes you should eat it cold since heating it can destroy the beneficial bacteria.
- This can last up to 6 months in the fridge. Look for any signs of mold, an even color throughout, and that it still looks edible. Make sure to keep the lid tight in refrigeration storage
I am a participant in the Amazon Services LLC Associates Program, an affiliate advertising program designed to provide a means for us to earn advertising fees by linking to Amazon.com and affiliated websites. This means that I will earn a small amount of money if you purchase through the links on my website at no additional cost to you

Easy Sauerkraut Made From Scratch
This recipe for sauerkraut made from scratch is so easy. Making your own sauerkraut is a great way to add gut healthy probiotics to your diet. It costs just a fraction of store-bought options.
Yield: 1 pint
Prep Time:
20 Minutes
Fermentation Time:
7-21 days
Total Time:
7-21 days
Ingredients
- 1000g Cabbage
- 1.5 TBSP non-iodized salt
Directions
- Prepare cabbage: Wash, Dry, Chop. Remember to leave out a few large cabbage leaves and set aside for later.
- Salt cabbage: Layer cabbage with salt in large bowl. Using clean hands (or gloves) thoroughly mix cabbage and salt until the brine is visible.
- Pack container: Using clean hands or optional tamper. Pack it down as tightly as you can to minimize air bubbles. Repeat this procedure, layer by layer, continuing to draw out brine. Pour any remaining brine over cabbage and make sure cabbage is completely covered with at least 1 inch of brine. Keep at least 1 inch of air space above brine. Cut a circle out of the larger cabbage leaves that were set aside and place this on top of the sauerkraut. Place weights and a lid on top of this. If your lid is not a fermenting lid, be sure to “burp” the lid once a day.
- Ferment: 7-21 days at 68—72°F. Dark or indirect light is also good.
Like this recipe? Share it with others!

Thank you so much for taking the time to learn how to make sauerkraut from scratch. Please leave a comment and let me know how your sauerkraut turned out. I would also love to know if you came up with any tips and tricks to make it even better!
Leave a Reply