I have mentioned this before but one of my favorite ways to use up sourdough discard is by making large batches of dog treats. In this post I will show you a recipe that creates simple sourdough dog treats with oats incorporated in them.
Making your own dog treats might seem like a lot of extra work for something you can “just buy from the store” but I promise this recipe will save you money and is WAY better for your furry friend than the store bought treats.

Table of Contents
Benefits of Sourdough for Dogs
Sourdough treats are a great way to add some dietary fiber and help prevent stomach upset due to the fermentation process of sourdough baking.
You just want to make sure that they only get these treats in moderation. As with anything, too much might cause your pup to feel unwell. So I usually limit these to 2-4 per day. I would recommend have a discussion with your veterinarian prior to feeding your dog anything new.
*NEVER feed your dog raw sourdough starter as this will make them very sick. You need to make sure you fully cook these treats to ensure they are safe for your pup.

Benefits of Oats for Dogs
Why would I add oats to my dog treats? There are many benefits to adding oats to your sourdough treats.
- These complex carbohydrates provide sustained energy.
- High fiber supports regular bowl movements.
- Contains beta-glucan which can help regulate blood sugar.
- Healthier coat due to high vitamin B and linoleic acid.
I know what you’re thinking now. You also want to eat more oats in your diet to get all these amazing benefits! Me too.

Ingredients Needed
- Unfed Sourdough Discard (learn how to make a sourdough starter with this post)
- All Natural Peanut Butter
- Whole-wheat flour
- Egg
- Water
- Olive Oil
- Oats
Simple Sourdough Dog Treats with Oats Recipe

Simple Sourdough Dog Treats with Oats
Ingredients
Equipment
Method
- Preheat oven to 300℉.
- Mix together sourdough starter, egg, olive oil and water.

- Add in peanut butter, oats, and flour. Mix well until it forms a dough.

- Knead the dough on a floured surface until you are able to roll it our nicely without it feeling too sticky. This should be about 1/4 inch thick.

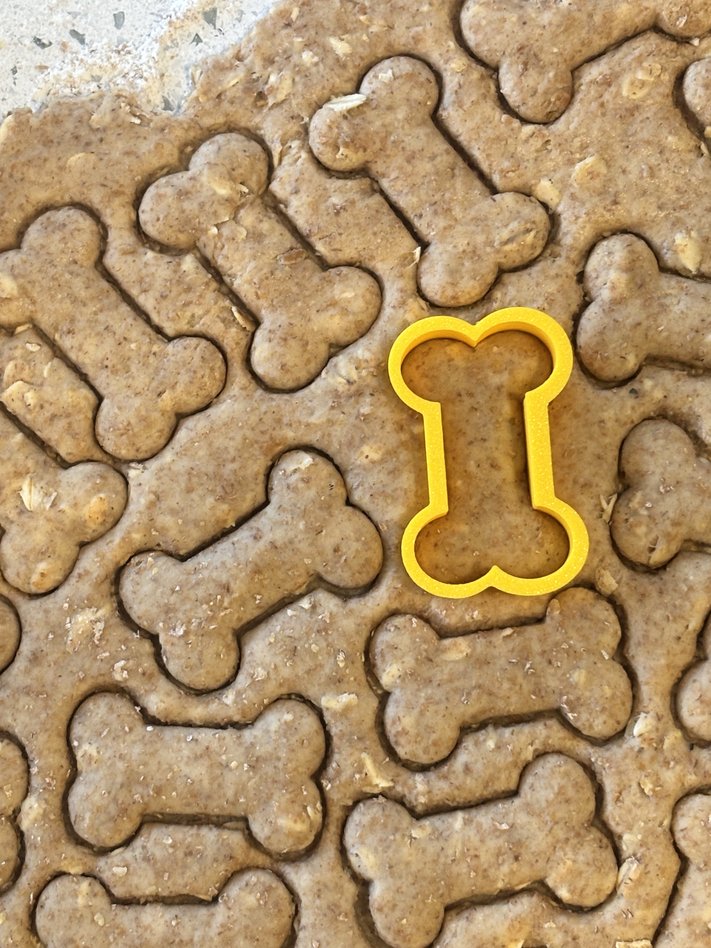
- Cut out your cookie shape and place them on the cookie sheets. These will not rise so you can put them pretty close together to fit lots on a single sheet. I used 2 cookie sheets and made about 65 biscuits.

- Bake at 300℉ for 50 minutes or until brown on top.

- Allow to fully cook on a wire rack before storing them. I leave these out on the rack for a while to make sure they are fully cooled and very dry feeling.

- Feed to your cute dog.

Notes
Flavor Alternatives
Instead of 1/2 cup of peanut butter, you can add:
- pumpkin
- banana
- mashed blueberries
- sunflower seed butter

Tips For Making The Best Homemade Dog Treats
No Extra Liquid
Make sure your sourdough starter is 100% hydration (meaning there are equal parts flour and water in the mixture). If you have extra liquid on top of your starter, please discard it before measuring out your 1 cup of starter.
When it comes to the peanut butter, it is important to mix it well. You do not want extra oil in your dog treats or the dough will not form nicely. If you get extra oil in, simply leave out the olive oil.
Allow The Dog Treats To Fully Dry
If you want your oat dog treats to last for a long time, it is very important that they are dry before you store them.
This recipe is very successful at drying the treats because of the long and low baking temperature.
To help with the drying process, you can leave your baked treats out on wire cooling racks for a few hours (even up to 12 hours) after.
The drier they are, the longer they will store.

More Easy Homemade Recipes
- Sourdough Dog Treat Recipe
- Sourdough Banana Chocolate Chip Muffins
- Easy Sourdough Chocolate Chip Cookies
- Sourdough French Toast Casserole
Conclusion
Making sourdough dog treats at home is such a simple way to use up extra sourdough starter while giving your pup something wholesome and delicious. I love recipes like this—just a few basic ingredients, no fuss, and you end up with a batch of homemade dog treats you can feel good about. If you’ve been looking for an easy way to keep your dog treats homemade and budget‑friendly, this little recipe is a great place to start.

Thank you for taking the time to check out this recipe and I hope your furry friend enjoy these oat dog treats as much as ours does!
Leave a Reply